Quick Facts

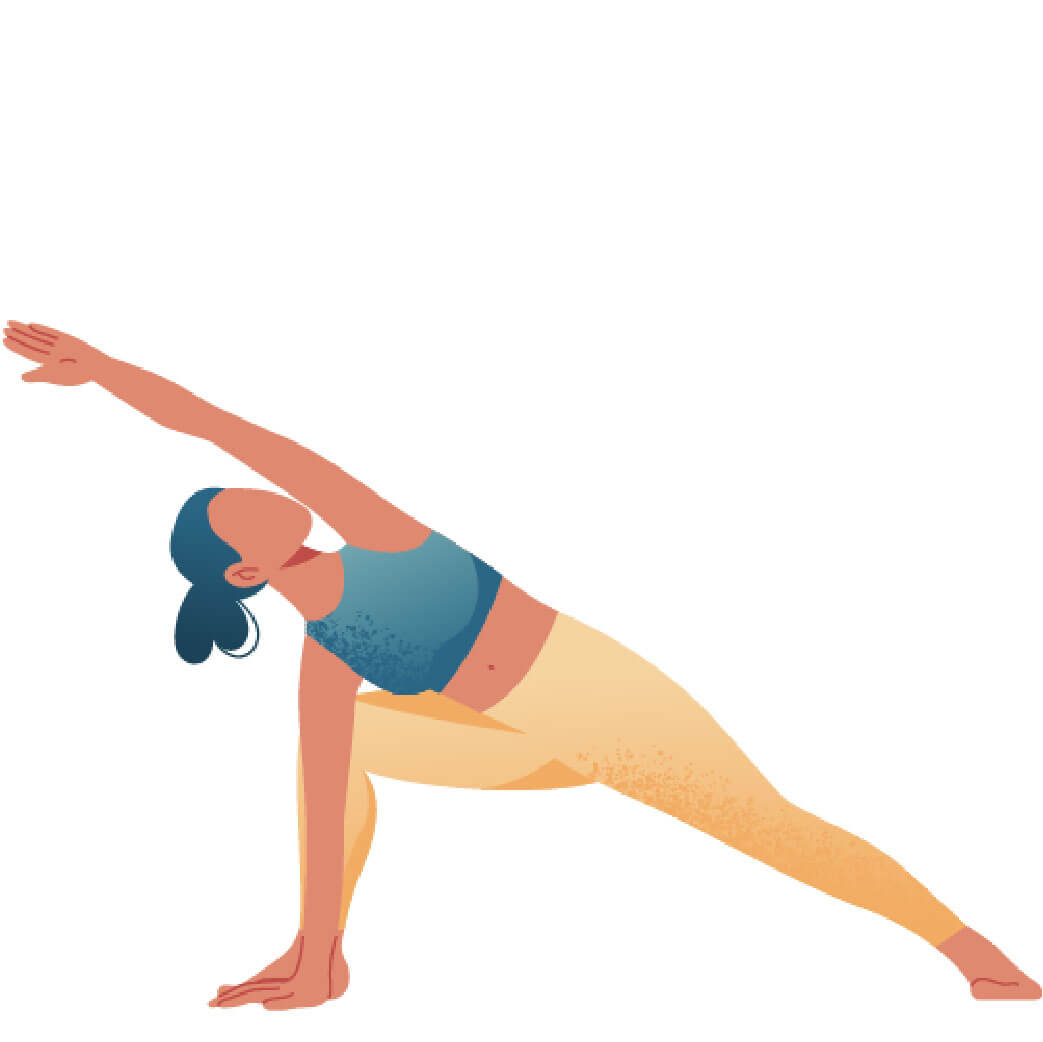
  • Sanskrit (Original): Ardha Candrāsana
  • Etymology: Half (ardha), moon (candra), pose (āsana)
  • Fun Fact about the pose: Half Moon Pose is a very common peak pose accessible for many yoga practitioners.
  • Asana Type: Balancing, Standing
  • Main length muscle groups: muscles_length_muscle_groups
  • Main strength muscle groups: Serratus anterior, rotator cuffs, deltoids, biceps, obliques, glutes, hamstrings, articularis genu and vastii; standing leg: hip flexors, gastrocnemius, muscles of the feet; lifted leg: abductors, quadriceps, calf muscles
  • Vinyasa Breath: Inhale

How to Cue the Pose: Step By Step

  • 1 Start standing in Virabhadrasana II (Warrior II).
  • 2 Place the back hand onto the back hip. The front leg is going to be your standing leg.
  • 3 Shift your weight into your front foot and take the front fingertips to the ground in a diagonal line out in front of the standing leg. The further the hand is in the front, the easier it gets.
  • 4 Step the back foot a few centimeters forward. You can even drag it forward.
  • 5 Keep the front knee bent and shift your body weight forward into your front leg and hand.
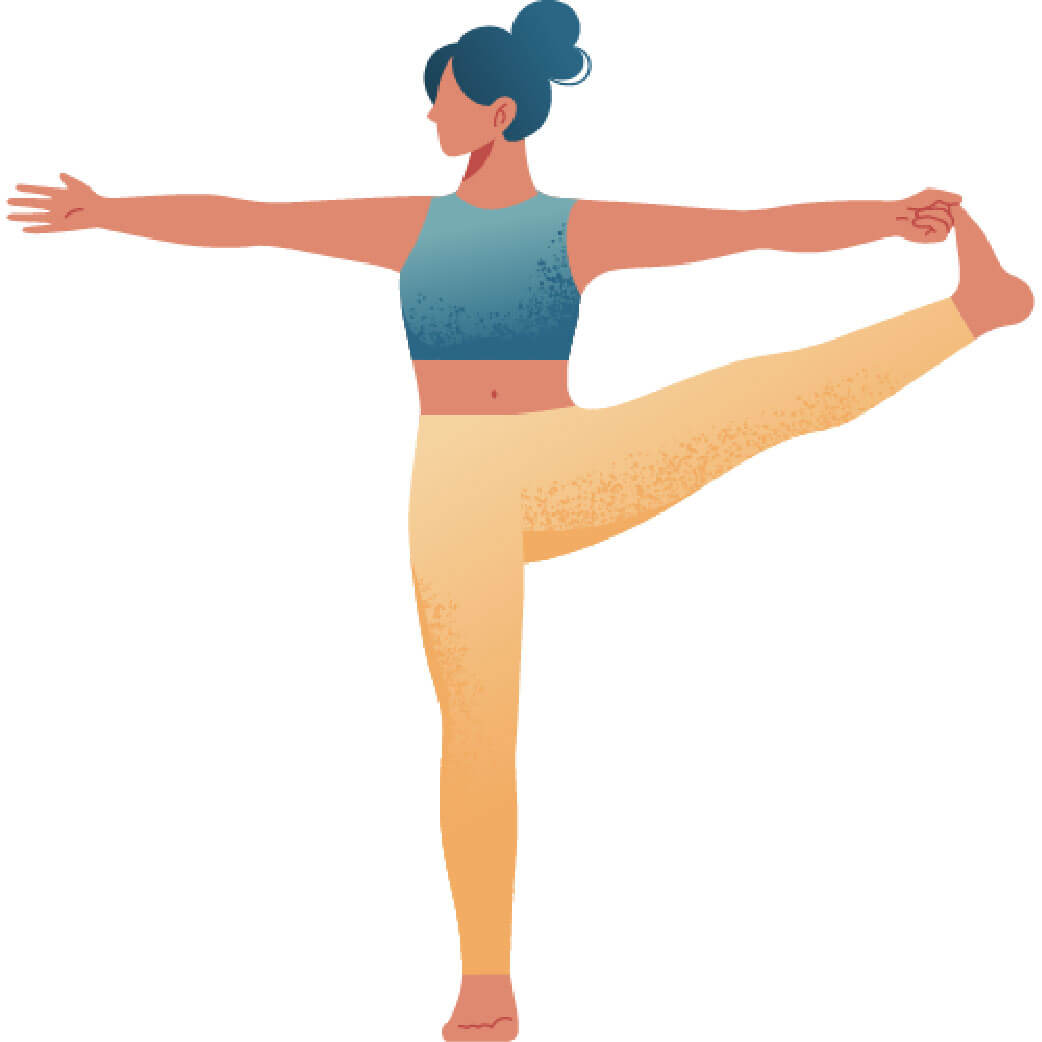
  • 6 Once you feel the body weight is shifted forward, lift the back leg on an inhale by using the strength of the outer back hip.
  • 7 Open your arms wide so that they are extending in line with the shoulders.
  • 8 Let the pelvis remain open like in Warrior II and turn the chest toward the sky.
  • 9 Flex the back foot (i.e. the lifted one) and engage it by pressing the heel away from you.
  • 10 Keep the standing leg slightly bent but lean back until you feel the heel pushing into the ground. This will also help to engage the buttocks muscles more.
  • 11 Fix your gaze (Drishti) at one point in front of you. This will help you maintain balance.
  • 12 To come out of the pose, bend the standing leg deeper and tap the back foot onto the ground.
  • 13 Engage your core to rise up and return to Virabhadrasana II.

Working The Details: Alignment In The Pose

  • Center your legs: Draw your legs towards each other, even though you are extending the lifted legs. This action will center the energy of your legs and help to increase stability in the pose.
  • Relax the toes: Once in a while, lift and wiggle the toes of your standing leg. Often they tend to cramp into the mat because all of the weight is bearing on top. However, the strength should be created in the arches of the foot rather than in the toes.
  • Keep the knee in the midline: A common thing to happen in Half Moon Pose is that the knee of the standing leg is turning inwards in order to open the hips further. This is putting a lot of pressure on your knee joint and should be avoided. Keep your standing leg slightly bent and the knee pointing towards the midline of your toes to create a stable and well-aligned foundation for the pose.
  • Draw your thigh bone into the hip socket: Simultaneously draw the thigh bone of your lifted leg into its hip socket while you are extending it. Observe if you are extending your leg straight out of the hips. Often the leg is slightly more to the back which overextends the hip flexors and the groins. Drawing the legs towards the hips helps to correct this action.

Adapting The Pose Through Modifications

Simplify

  • If it’s difficult for you to touch the floor with your front hand or fingertips, use a block for support. Play with the different heights of the block, i.e. by starting at the highest height and, with increasing balance and stability, lower it down to its middle height, and then – finally – to its lowest height.
  • Practice Half Moon pose near a wall to start off with if balancing on one leg is challenging. Support your lifted foot on the wall. This also helps you to get a feeling for bringing the leg parallel to the floor.
  • Press the sole of the foot into the wall to give your lifted leg a reference. The pressure of the raised heel against the wall will help you maintain your balance.

Level Up

  • Gradually take the weight out of your bottom hand until the tip of the middle finger is the only thing touching the floor. As a next step, try to even hover the hand above the ground or extend the arm out in front of you and parallel to the floor. However, don’t let this comprise the solid alignment of the rest of the pose.
  • Practice Ardha Chandrasana on the tip of your toes and/or close your eyes to really work on your balance.
  • Transition into Sugarcane Pose (Ardha Chandra Chapasana) by bending your lifted leg so that the heel moves toward the buttocks. Reach back with your top hand and clasp your ankle. Push the foot into the hand and vice versa to come into a gentle backbend.

Benefits of Ardha Chandrasana

  • Ardha Chandrasana is a great pose to improve your balance and focus as well as core stability. This will benefit you in a variety of other sports and in your daily activities, especially as you get older.
  • It also strengthens the entire body, especially the thighs, ankles, and feet. It also is a great stretch for the hamstrings. So, if you’re a runner or cyclist with tight hamstrings, the yoga pose Half Moon can be very beneficial for you.
  • This pose also helps you open your chest and shoulders and hips.
  • Due to the challenge it provides for your coordination and sense of balance, you will also find that it relieves stress and helps you clear your mind.

I really love transitioning into Half Moon Pose and imagining the rise of the moon. It is one of my all time favorite poses as it combines balance, strength and opening all at once and gives me a sense of pristine focus and calmness.

Saskia

Content Manager at Inside | Passionate Yoga Teacher

FAQ: Common questions about this pose

In classical yoga lineages the full pose is taught with the gaze going up towards the top hand. As your cervical spine is already fairly mobile this action does not bring you any major benefit from a biomechanical point of view. For many practitioners the rotation of the neck in combination with lifted arms leads to compression and pain rather than release and more opening. So if you experience pain in the neck muscles in Half Moon Pose you can practice looking either straight in front of you or even down to the ground. You will reap the same benefits as with your gaze going up. Just beware to keep your cervical spine long and extended even when you look down towards the ground.

This feeling can be an indicator for hyperextension in the knee joints. This means that your knee joint is able to move into the wrong direction and extend beyond its healthy capacity. This is because the muscles and ligaments encompassing the knee are unable to support it properly. For the time of the pose, maintain soft bend in your knee and pay attention to the muscles supporting the knee. You can also change this condition by adding strength training specifically for your knees.

The nature of the pose is a very small twist in the spine. In theory, the spine should extend right out of the middle of your pelvis in a straight line. However, for some people the twist is a bit deeper, as they have less movement and articulation in the hips. If you can, keep your spine fairly straight. If you feel that you are compromising other parts (e.g. the opening of the hips) to achieve this, add a deeper twist to the spine. This will also help you to bring your spine more into the center of your hips.