Especially at the beginning of a new year or with the arrival of spring, everyone wants to become healthier, fitter, slimmer – you name it. So why not start the transformation process by detoxing your body first to get rid of all traces of your previous unhealthy lifestyle?
If you’re attending yoga classes on a regular basis, you will certainly have heard the claim that yoga poses, especially yoga twists, detox your body. And you’ve probably also heard the exact opposite: that yoga does not detox anything at all. What should you believe? And why should you practice yoga twists anyway?
Let’s look at the myth of yoga twists and detoxing in detail:
1. Can Yoga Twists Really Detox Your Body?
It is often said that twisting postures cleanse or detoxify the internal organs, in particular, the liver. The idea that yoga twists can detox the body was popularized by the famous yoga teacher B.K.S. Iyengar. According to him, twisting poses compressed the muscles and organs, blocking the flow of blood. When releasing the poses, the blood flows back into those areas, improving circulation.
However, the liver has its own natural detox process, which is mainly a cellular process. Doing yoga twists and other yoga poses doesn’t actually detox organs. The concept of cleansing and detox rather is a metaphor for practices that improve already existing detoxification processes in the body by contributing to overall health. Our organs, such as the liver, kidneys, and the skin, are perfectly capable of detoxing on their own, provided that they’re healthy. They filter toxins, including substances from food, alcohol, and medications, from our blood.
Does this mean that yoga twists are useless? Well, you certainly can’t compensate excessive alcohol consumption with some extra rounds of Ardha Matsyendrasana the next morning. However, twists are an important part of a balanced yoga practice as they improve circulation – which certainly is beneficial to your internal organs.
But you’re not actually “wringing out” your liver every time you perform a Revolved Triangle pose. While this pose certainly strengthens and releases quite a number of muscles in your body, it does not affect the biochemical processes in the liver.
It rather is the case that any form of physical activity – not just yoga – supports the functionality of the organs in performing their normal detox processes. Apart from that, exercising in general gets your cardiovascular system going, improves your blood flow and, thereby, has a positive impact on your body’s systems and processes.
Besides, people who regularly practice yoga (or do any other form of exercise) usually have adapted healthier lifestyle habits such as healthy eating, little to no alcohol consumption, enough sleep and reduced stress levels. All this works towards optimal organ functioning, ensuring that the body’s own detoxification processes can work at their highest level.
So, roll out your yoga mat and practice a few rounds of yoga twists. Your body will appreciate it.

A healthy lifestyle is the best support for your body’s detoxification. Photograph by Vitalii Pavlyshynets on Unsplash.
2. 5 Foundations of Yoga Twists
When it comes to yoga twists, it’s important to observe some elemental alignment principles that help you to twist deeper and, thus, benefit even more from these poses. Learn 5 steps to deepen your yoga twists from TINT instructor Matt Giordano as he takes you on a journey through the core in his 90-minute Detox Flow.
2.1. Set Stable Foundations
The first step should always be setting stable foundations for your twist. Start by bending the knees to tilt the pelvis anteriorly. Then, lift the belly up by letting the ribcage move up toward the chin and the belly squeeze in like a muscular corset wrapping around your waist. Imagine you’re slurping up a smoothie to lift the belly up. Lifting the abdomen also elongates the spine, giving you more space to move. This makes twisting a bit easier.
When you lift your ribcage up, imagine you’re stepping up stairs: Lift up the right ribs first and then lift up the left ribcage above the level of the right ribs. Keep that lifting and move the right ribcage further up again and so on.
At the same time, you move the pubic bone down so that the belly elongates. You will feel the transverse abdominal muscles sucking the waistline in and giving you the space to rise.
1. Elevate the abdomen.
As you breathe, you want to keep your abdomen in. This requires you to breathe through the sides of the ribs or maybe even the back of the heart.
2.2. Round the Spine
The first step when you get into a twisting pose is rounding the spine.
2. Round the spine.
2.3. Arch the Spine
Once you’re in the twist, arch the spine on an exhale to get deeper into the twist.

3. Arch the spine.
2.4. Sidebend Up
Elongate the underside of your waistline to sidebend your torso upward and twist even more.

4. Sidebend up.
2.5. Sidebend Down
Lengthen the side of the waistline that is facing the sky to sidebend the torso down and go deeper into the twist.

5. Sidebend down.
Return to step 1 and repeat the actions again until you’re as deep in the twist as you can.
These steps help you create your maximum twist. They enable you to identify where the tight spots are in your body and spine. When you root down through the legs and create the movements of elongation, rounding, arching, and sidebending, you will be able to perform deeper twists.
If you’re looking for more guidance on your yoga practice, check out our free collection of yoga class plans, which provides detailed descriptions of different yoga class themes that are suitable for various level. You’ll find, for example, yoga for beginners, an evening yoga practice, or a morning yoga sequence. You can use this ebook for your own practice or if you need inspiration for your teaching.
3. 12 Yoga Twists Your Body Will Love
Warm Up First
Before you start moving your body into deep yoga twists, warm up the body with some gentle movement and easier, more subtle twisting poses. You can do this, for example, with Matt Giordano‘s Detox Flow on TINT. After a short warm-up sequence, he guides you through a variety of yoga twists. This Detox Flow combines both movement and technique to help you let go of unwanted tension from the body and mind.
Prepare your body with the short warm-up sequence from Matt Giordano in his Detox Flow on TINT.
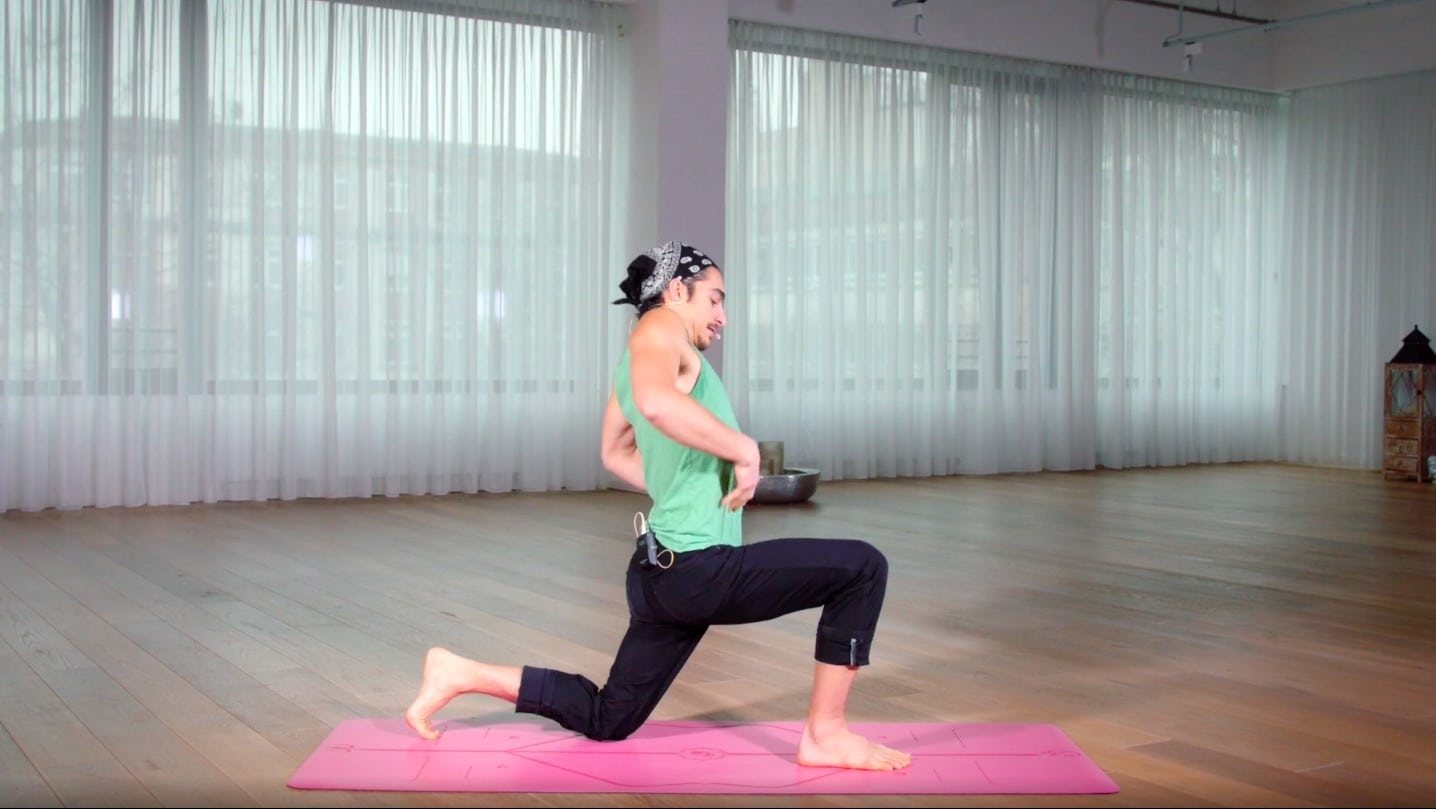
1. Runner’s Twist with Backbend
From Mountain pose (Tadasana), bow down into a Forward Fold (Uttanasana) and step the left leg back into a Runner’s Lunge. Come onto your fingertips and squeeze the shins isometrically toward each other so that you feel a slight lift in the hips. Root the right heel firmly down into the yoga mat.
With that action of pressing down, draw the outer right hip back and under. Place the left hand further to the left side and back a few inches. Take the right hand behind the head and arch the back so that the chest faces the front of the yoga mat. Elongate the waistline by drawing the belly up toward the ribcage.
Take a full breath here before you release the hands back down onto the ground. Repeat on the opposite side.

Arch your spine in Runner’s Twist.
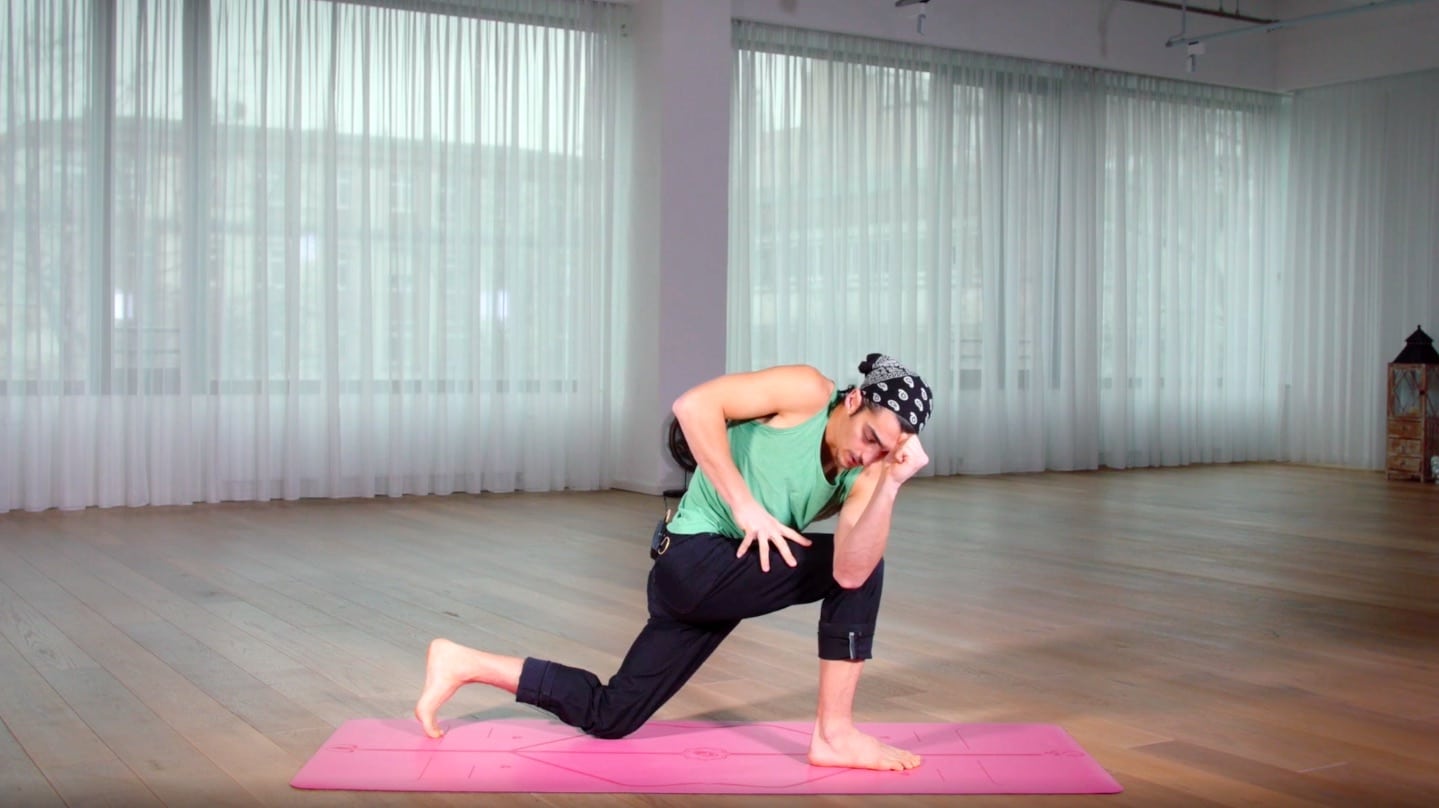
2. Crooked Monkey
Start in Warrior 2 and bring both hands back onto the yoga mat, placing the back knee down for a Low Lunge position. Heel-toe the front foot further outward and bring the left hand further out in the opposite direction. Place the right hand onto the back of the head and arch the spine into a little backbend. If available to you, reach back for your back foot with the top hand for a thigh stretch.
This will awaken the muscles in the core and the iliopsoas. The latter attaches to a number of muscles in your lower back and loosening it up helps to release tension in this area.
To go deeper into this pose, instead of just stretching deeper, start engaging the muscles by pulling the back knee isometrically forward until you feel the front of your hip flexor engaging. At the same time, kick your back foot into your hand to engage the quadriceps. If you can, you can now try to bring the foot closer in toward your buttocks.
Release the pose and transition into Downward-Facing Dog and step into Warrior 2 with the left leg to repeat the previous poses on the opposite side. Then, step back into Downward-Facing Dog and return to Mountain pose.

Target your iliopsoas with Crooked Monkey pose.
3. Low Lunge with Sidebend
From Tadasana, bow down into Ardha Uttanasana (Half Forward Fold) and step the left leg back, placing the knee down onto the yoga mat. If available, use a yoga block (or a thick book or something similar) for this next pose as this will make it easier accessible. Otherwise, you can simply come onto your fingertips.
Put the yoga block on the outside of your right hip and place the right hand onto the block. The left hand rests on top of the front knee. Gather strength in the legs by pulling the back knee forward and the front foot back until you feel the pelvis slightly lifting.
From that strength in the legs, draw the abdomen in and up as if you were trying to climb the ribcage up. Let the left ribs poke up to the sky and take the left arm up and over the ear to sidebend over to the right side. This pose is a combination of Reverse Warrior and Low Lunge.
Release the pose after a few breaths and step forward into Uttanasana and then step the opposite foot back, repeating the same pose on the other side.
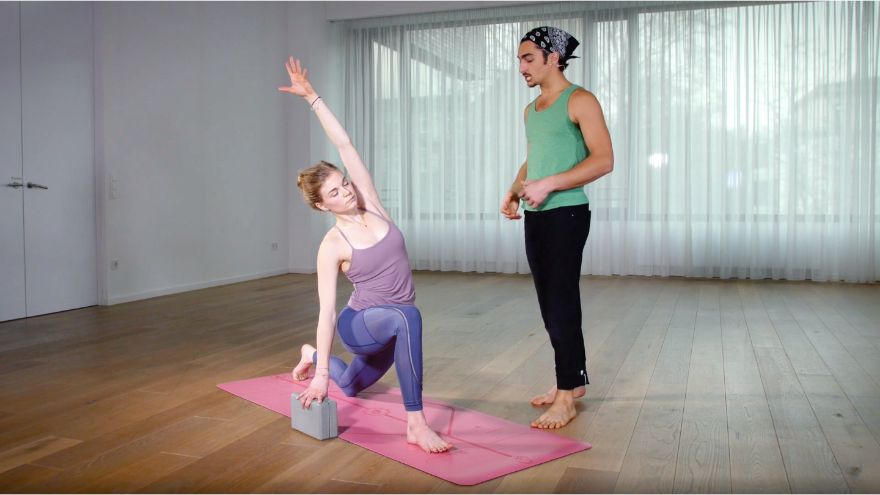
Combine Reverse Warrior and Low Lunge.
4. Runner’s Twist with Arms Extended
From Uttanasana, step the left leg back again and, this time, keep the knee lifted. Place the left fingertips onto the yoga mat and the right hand onto your right knee to prepare for a twist.
The tendency in this twist is that the left hip drops toward the ground. Do your best to lift it up. It doesn’t have to be level with the right hip, but a little lifted so that the twist is not only happening at the pelvis but also at the spine.
Use your right hand to push it down and turn your chest toward the sky. Take the right hand all the way up and pull yourself up from the wrist so that there’s an expansion all the way through the fingertips.
After a few breaths, step forward and lift halfway into Ardha Uttanasana and then step the opposite foot back to repeat this Runner’s Twist on the other side.

Expand through the fingertips in Runner’s Twist.
5. Revolved Chair Pose
Come to the front of your yoga mat and bend the knees for Chair pose (Utkatasana). Keep the feet about hip-width apart and tilt the pelvis anteriorly to create an arch in the lower back.
Place the hands on top of the right knee. Lift the abdominals up by alternating between raising the right ribs up and the left ribs up. Once you feel you’re elongated as much as you can, take the left elbow across to the right knee. Use the right hand to push down and lift the chest up. Then place the right palm on top of the left palm to come into a Revolved Chairpose.
To counteract the tendency of the left hip tends to come forward, consciously take it back. Try to turn the belly toward the sky to the right so that the belly button moves to the right. You can turn your head to either just face to the right side or even up toward the sky if that feels comfortable. Maintain the pose for a few breaths and unwind on an inhale, taking the fingertips down onto the ground.
Bend the knees for Chair pose again and, this time, twist to the left side and repeat the same actions here for Revolved Chair pose on the left. Return to Uttanasana at the end.
Twist and strengthen in Revolved Chair pose.
6. Revolved Low Lunge
From Uttanasana, lift halfway into Ardha Uttanasana and step the left leg back. Place the left knee down onto the yoga mat and let your hands rest on top of your right knee.
Start by establishing a rounded position by rounding your back and pulling the ribcage back. Keep this rounded back as you bring your left elbow across to the right thigh. Keep the right hand on the thigh at the beginning to push into your thigh.
Now, create an arched position by elongating up and moving the chest away from the hips. As a next step, start to sidebend by taking the right ribcage toward the right hip. Then, sidebend back the other way and turn your chest at the same time.
Place your right palm on top of your left one and repeat the previous actions: Draw the belly up, round your body into the pose, arch back and twist a little bit more and, lastly, sidebend up and down for the final twist. Stay for a few breaths.
Release this deep twist by bringing both hands back onto the yoga mat on either side of your front foot. Take a moment here to observe how you feel and then step forward into Uttanasana. Lift halfway again and step the right foot back to repeat the pose on the opposite side.

Enjoy a deep twist in Revolved Low Lunge.
7. Revolved Hand to Knee or Big Toe Pose
From Uttanasana, place both hands onto your hips and rise up to stand in Mountain pose (Tadasana). Lift the right knee up toward your chest. Bend the knee of the left leg (the standing leg) slightly to anteriorly tilt the pelvis.
Place the left hand on the outside of the right knee and repeat the same actions you did in the previous poses: Lift the abdomen up to create some length in the waist and then turn the chest. You can place the right hand either on your hip or extend it back. Lift the belly button up and turn it to the right.
You can either stay here or take hold of the outer edge of the right foot and extend the leg out. Note that the tendency here is that you lean backward. To counteract this, move your hips back and push your foot against that action into your hand.
You will probably also notice how your left shoulder pokes out. Try to consciously move the shoulder back. Now you can choose whether you want to keep the standing leg slightly bent or straighten it if that feels more stable.
Hold the pose for a few breaths and then return to center and repeat the pose twisting to the left side.

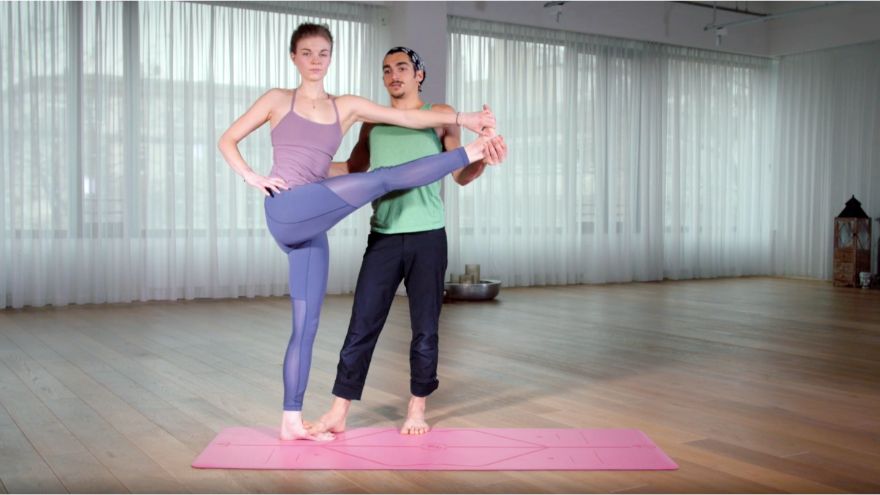
Chose whether you want to keep the knee bent or straighten the leg.
If you’re looking for more guidance on your yoga practice, we’ve created something special for you: a free eBook that contains yoga class plans ready to use for your classes. The eBook offers different classes for different levels, where you can find the asanas along with their descriptions in a logical order.
8. Prayer’s Twist
From Uttanasana, lift halfway and step the left foot back. This time, keep the hips elevated and the back leg strong. Root the right outer hip down into the heel and place the hands onto your right knee. Hinge slightly forward and round the upper back. Make sure your legs are really solid and stable.
Take the left elbow across to the right thigh. Draw the belly in and turn it to the right and up. Arch the back to increase your range of motion. As you exhale, sidebend up and, on the inhale, sidebend back down to increasingly deepen the twist. When you can’t go any deeper anymore, place the right palm onto the left and lift the chest.
On an exhale, return to center and into your Forward Fold again. Give your body a few moments of rest here before repeating the twist on the opposite side.
Remember the 5 steps to get deeper into twists.
9. Revolved Half Moon
Start from Downward-Facing Dog and step the right foot forward between your hands. Take the hands about one foot further toward the front of your yoga mat. Lift the left leg up and straighten the right leg to come into a supported Warrior 3.
Try to keep the left hip lifted and take the right arm up to the sky. Root the right heel down into the ground to level the hips. Arch your back and elongate to get deeper into the twist.
Take a few deep breaths here before you release both hands down to the ground and step back into Downward-Facing Dog. Repeat the twist on the opposite side.

Twist and balance in Revolved Half Moon.
10. Side Angle Pose
For an open yoga twist, start in Downward-Facing dog and lift the right leg up. Step the right foot forward between the hands and rise up into a High Lunge position. Open the arms to the sides and come into Warrior 2.
On an inhalation, lean back towards your back leg for Reverse Warrior, stretching the right side of the waistline. On the next exhale, place the right forearm on the right thigh and the left hand onto the hip for Side Angle pose.
Root the right heel straight into the ground until you feel the right buttock engage. Try to move the right pelvis slightly underneath and keep that strength in the right hip. Slide the right fingertips down on the inside of your right leg and place them next to your right foot. Reach the left arm up to the sky by turning the belly upward.
To deepen the twist, round the back first and turn and arch the back on an exhale to open up. Then slightly sidebend up to the sky and, as you twist, sidebend down toward the ground. Stay in the pose for a few big breaths and release the hands to the ground on an exhale. Take a few breaths in Child’s pose before you repeat the pose with the left leg in front.
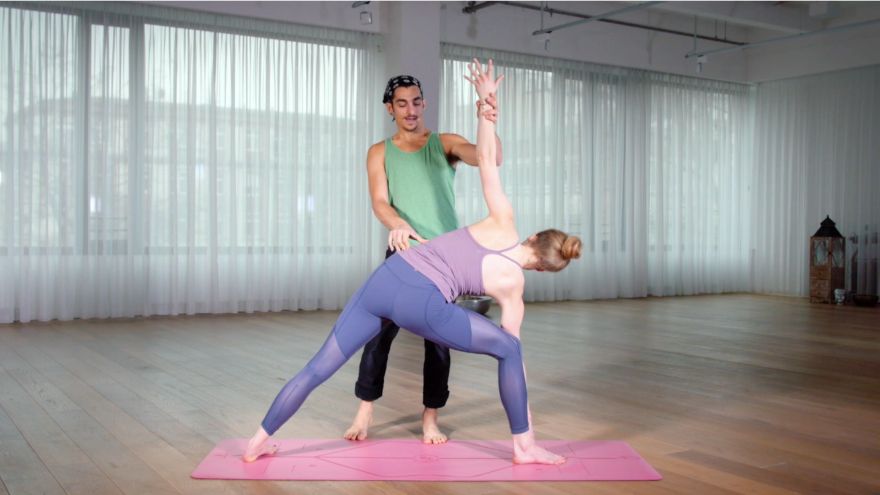
Practice Side Angle pose as an open twist.
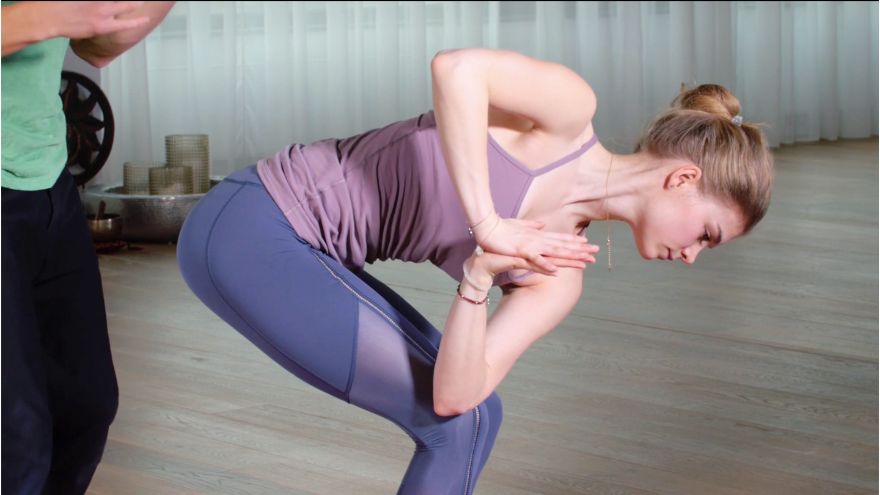
11. Ardha Matsyendrasana
Come into a seated position and take the right leg over the left one. In seated poses, it’s particularly important to anteriorly tilt the pelvis to arch the back. Move the top of the sacrum further in to get a more pronounced arch in the lumbar spine. This is important because the natural curves of your spine will create the most depth in your twist.
Root the heel of the top leg down into the ground and lift the belly. Take the right hand back behind you to support yourself and place the left hand onto your top knee. Round the back first and, on an inhale, arch the back and twist. Lift up and turn the right side of the waistline and then lift up and turn the left side.
Stay for a few breaths in the twist and take a counter-twist tp the left side before repeating Ardha Matsyendrasana on the opposite side.
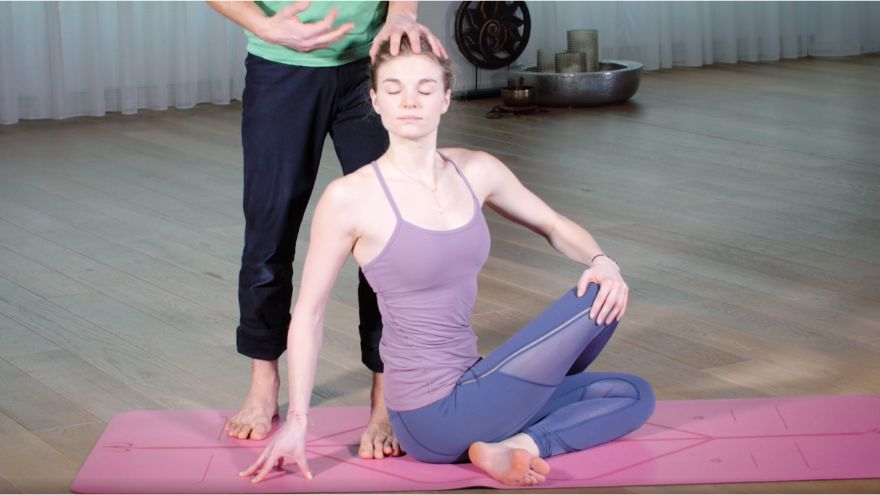
Unwind in a seated twist.
12. Supine Spinal Twist
Finish your twisting practice with a supine spinal twist. Lie down onto your back, bend the knees and place your feet onto the ground. Shift the hips to the right side of your yoga mat and straighten the left leg. Take the right knee across the body for the spinal twist.
Here, the anterior tilt of the pelvis becomes particularly important because the tailbone tends to tuck underneath, causing the lumbar spine going into the opposite curve. In order to avoid this, move the hips back and the belly forward so that the lumbar spine is arched.
Lengthen the belly and turn the belly button toward the right shoulder. Lift the underside of the waistline up and away from the ground to create more space.
Hold the pose for a few breaths and return to center. Repeat the twist on the opposite side.

Finish your twisting practice with a supine spinal twist.
If you’re looking for more features to make your yoga practice or yoga teaching easier, have a look at our free collection of Yoga Class Plans, which provides free sample yoga class plans for various different class types and levels. Each class contains a sequence of asanas along with their description and is a great tool if preparation time is short and you just want to roll out your mat or start teaching.